
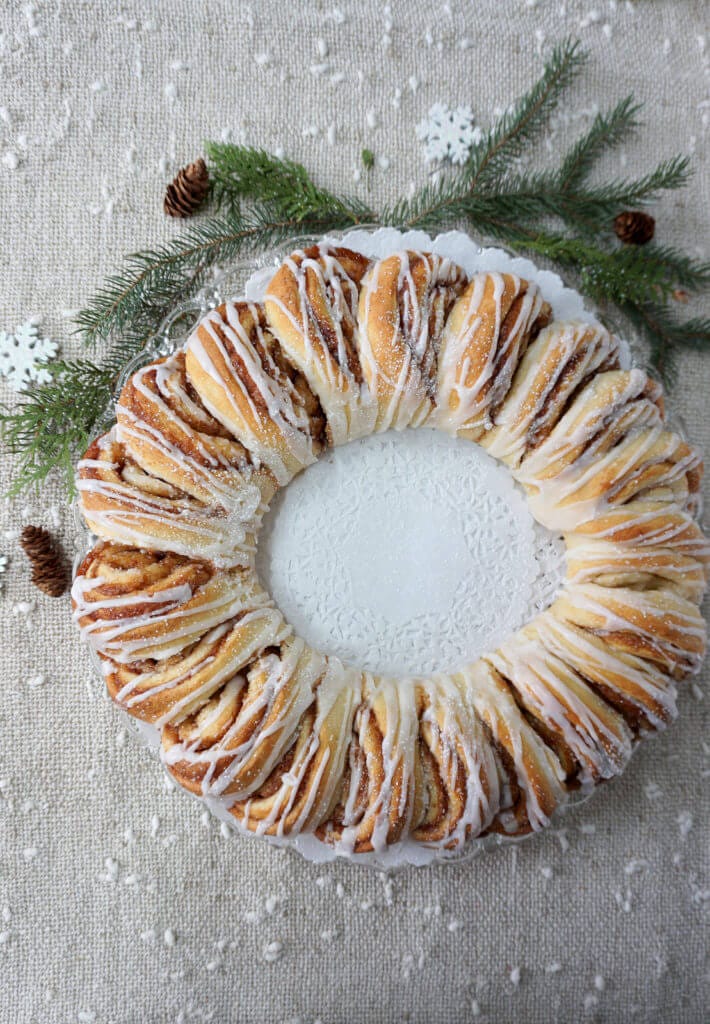
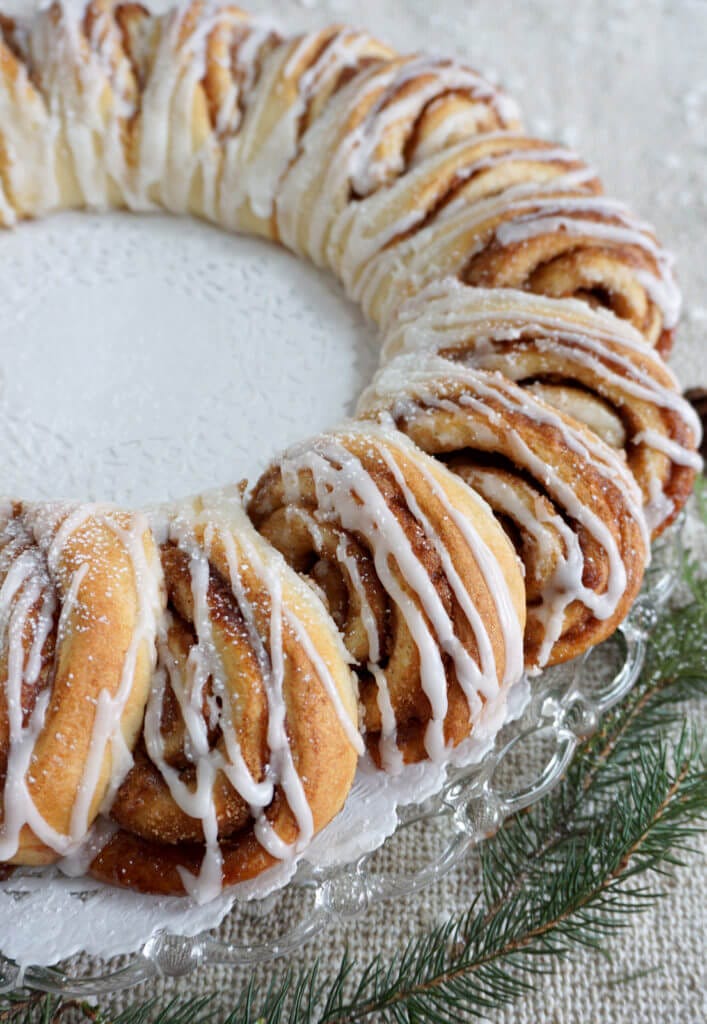
Isn’t this the cutest idea for your Christmas brunch, a cinnamon bun wreath?! Not only is it beautiful to look at but also it’s down right delicious!! And the best part, if you know how to make basic cinnamon buns then you won’t have any troubles turning them into this beautiful wreath! It’s so simple!
I wanted to bake something that was fun and festive. Something you could enjoy at a Christmas holiday brunch or snuggling around the fire with your family in your PJ’s – sipping on a hot cup of cocoa enjoying a warm cinnamon bun from the oven. And isn’t that what the holidays are supposed to be about – sharing with friends and family?!
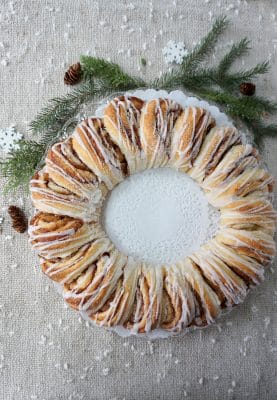
This is really a simple version of classic cinnamon buns, so I do hope you will try out the wreath version this Christmas. I simply took a few cuttings off some trees and placed it around the cinnamon bun wreath to create a festive feeling, which I know you can easily do too!
When working with yeast dough, I always knead my dough by hand. I find the process somewhat therapeutic; time seems to stand still while I’m folding and kneading away. But this time I decided I would try using my dough hook on my Kitchen Aid. I wanted to try the dough hook as I’m sure a lot of you guys have a Kitchen Aid at home too, but like me have never used it. If you’re pressed for time using the mixer might be a good idea as you can do a little more multi- tasking in the kitchen while your mixer does the work. Now I know what all the fuss is about! Let me tell you, I am so, so pleased with how my dough turned out!! I found my dough was light, full of air and soft in texture. I definitely will be using my Kitchen Aid again to make dough! You guys need to try it too!
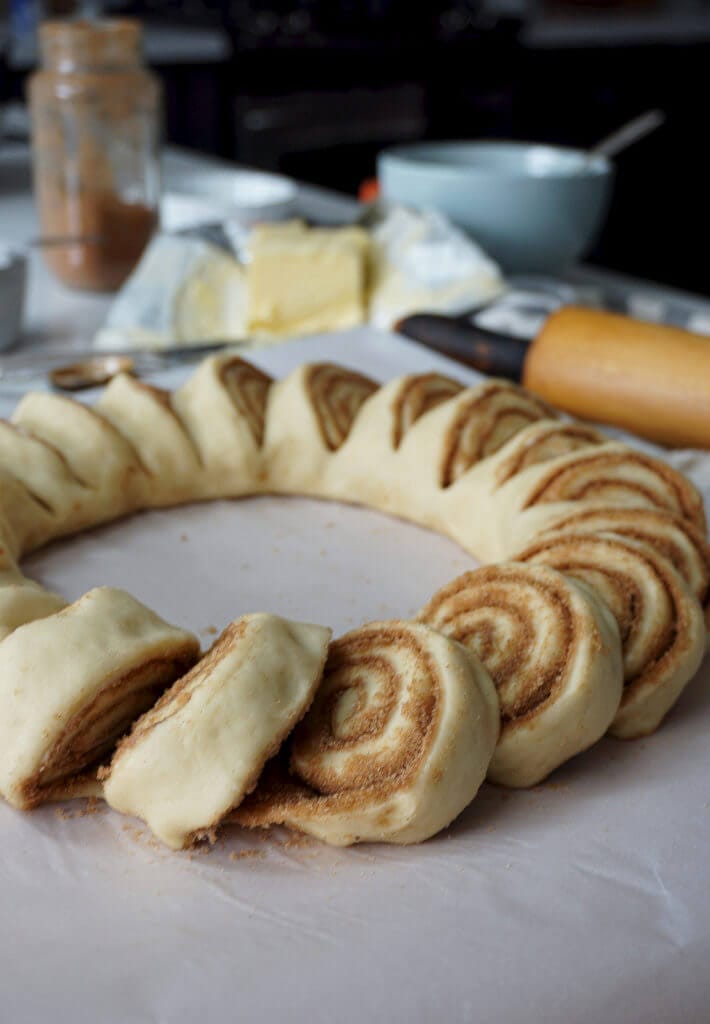
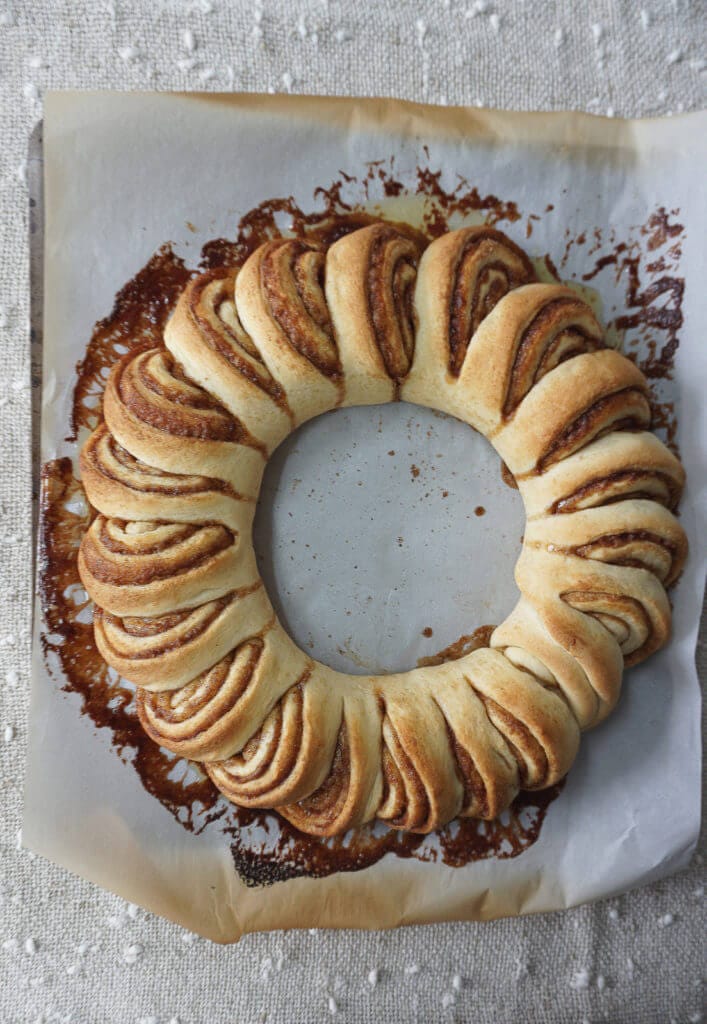
I had a lot of fun making this cinnamon bun recipe. I always enjoy being creative in the kitchen, especially when I’m working with a familiar recipe. Sometimes it amazes me how one simple change in a recipe can achieve such a different result. And that’s exactly what happened when I was making this cinnamon bun wreath! Once you roll up your dough into a log, you normally cut 1 inch rounds off the log and place each individual roll into a baking dish. But for the wreath you don’t cut all the way through each 1 inch round. You stop cutting part way on each round. You should still have one long log with partially cut rolls. Then you simply attach one end of the log to the other end creating a circle and volia, you have a pretty cinnamon bun wreath!
One thing to watch out for when baking your wreath is what type of baking pan you use. Normally you bake cinnamon buns in a dish; that way your buns are baking in all of the gooey cinnamon sugar and butter that melts out. It has nowhere to go but to stay in the dish and bake around and in the buns. Since you’re not baking in a dish the delicious gooey butter mixture leaks out and can drip off your pan and into your oven. I used a flat baking pan and ran into this problem. You might want to consider using a baking pan with sides. The gooey butter is the best part so make sure you tilt the baking pan once or twice so it runs back into the buns.
Happy Holiday Baking, you are going to love this Cinnamon Bun Wreath recipe and your guests will love it even more!


Cinnamon Bun Wreath
This is really a simple version of classic cinnamon buns, turned into a wreath for the holidays.
- Prep Time: 2 hours
- Cook Time: 15 mins
- Total Time: 2 hours 15 mins
- Yield: 20 buns 1x
- Category: Bread
- Cuisine: Swedish
Ingredients
- 1/2 cup full milk
- 1/4 cup sugar, separated (2 teaspoons of sugar)
- 1/3 cup unsalted butter
- 1 teaspoon salt
- 1/4 cup warm water
- 1 package active dry yeast (2 1/4 teaspoons)
- 2 eggs, at room temperature
- 3 – 4 cups all purpose flour
For the Filling
- 1 cup packed brown sugar
- 1 Tablespoon ground cinnamon
- 1/4 teaspoon ground nutmeg
- 1/2 cup unsalted butter
- 3 Tablespoons unsalted butter, melted (for brushing on top of the wreath)
Icing
- 2 cups sifted icing sugar
- 2–4 Tablespoons hot water
- 1/2 teaspoon pure almond extract
Instructions
- In a small saucepan, heat milk, sugar (all but 2 teaspoons of the sugar) and butter together until sugar has dissolved and butter is melted. Turn off heat and let cool until lukewarm.
- Meanwhile, in your mixing bowl add warm water, yeast and the 2 teaspoons of sugar. Let rest approx. 10 minutes until frothy.
- Add milk mixture, eggs, 3 1/4 cups of the flour and salt to your yeast (add more flour if needed). Using your dough hook mix on low speed for 8-10 minutes, scraping down the bowl every so often, until dough is smooth and elastic.
- Form dough into a ball and place in a greased (oil) large bowl, cover with plastic wrap, and let rest until doubled in size, approx. 1 – 1 1/2 hours.
- Once dough is doubled in size, place on a lightly floured work surface and punch dough down. Roll into a large rectangle approx. 15 inches x 9 inches.
- Slide parchment paper under your rectangle leaving lots to overhang your rectangle.This step is very important to making your life easier!
- Spread butter over the entire rectangle leaving about 1/2 inch from the edges.
- In a small bowl mix together brown sugar, cinnamon, and nutmeg. Spoon the sugar mixture over the butter and press down.
- Starting at the long side of the rectangle (15 inch side), tightly roll into a log pinching seam to seal.
- At this point slide your baking pan under your log and parchment paper.
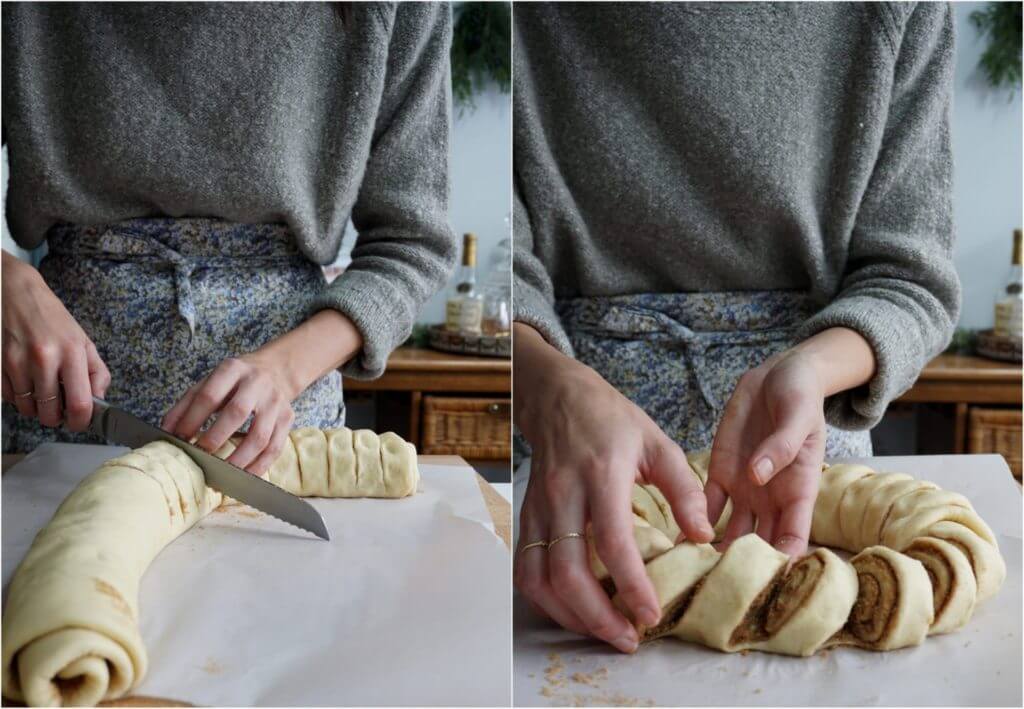
- With a serrated knife, cut 1 inch rounds, making sure not to cut all the way through. SERIOUSLY, DO NOT CUT ALL THE WAY THROUGH!! This is what keeps your wreath together. Cut just more than half way making about 20 cuts in total (20 cinnamon buns).
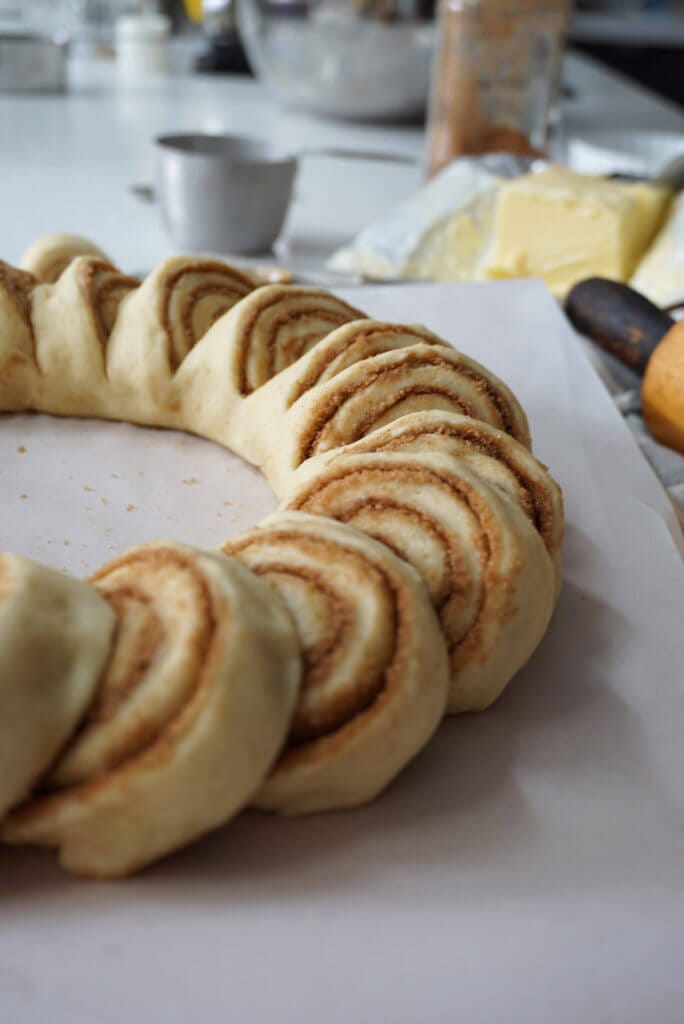
- Now attach both ends of the log together, creating a circle. Slightly separate the cuts so you can see the inside of each cinnamon bun. Cover with plastic wrap and let rest for 30 minutes, until doubled in size.
- Preheat oven to 375˚F.
- Brush the tops and sides of your wreath with melted butter.
- Place in the oven and bake for 15 minutes or until golden brown. Let the wreath cool on the baking pan.
- Meanwhile make your icing.
- Mix icing sugar, hot water and almond extract together until you reach a spreadable consistency. Start with 2 tablespoons of water and add more if needed.
- Once your wreath is cool, drizzle icing over the entire wreath either by using a piping bag or with a spoon.
- Enjoy!
Notes
Use a baking pan with edges so you don’t lose your butter filling all over your oven.
Optional, you can add cranberries, pecans or chocolate to your filling.
Cinnamon buns will last 2 days, best served the day of.
You can also make your wreath the night before and bake it fresh in the morning. Follow normal instructions until step 13. Once you’ve shaped your log into a wreath, cover with plastic and place in the fridge overnight. In the morning pull out of the fridge and let rest for 20-30 minutes then continue the recipe as directed.
Nutrition
- Serving Size: 1
- Calories: 288
- Sugar: 21.7g
- Sodium: 210mg
- Fat: 12.4g
- Saturated Fat: 7.6g
- Unsaturated Fat: 0
- Trans Fat: 0
- Carbohydrates: 41.4g
- Fiber: 0.9g
- Protein: 3.6g
- Cholesterol: 47mg
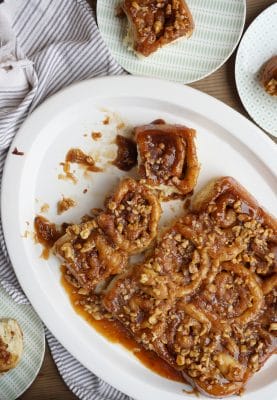
You may also like:


Leave a Rating and Comment!
I love hearing from you! Leave a comment with any questions or how your recipe turned out (your email address will not be published)!
Hi there!
May I suggest you revise your recipe to actually include the step of adding the salt? I spent hours excitedly working on this beautiful wreath on cinnamon rolls only to discover that I never added the salt because the recipe doesn’t say to (so naturally, I forgot it was even there). My rolls came out bland and overall I am very disappointed especially after literal hours of work.
Hi Jeanine, thank you for taking the time to let me know my mistake, I really appreciate it. I’ve made the correction in the recipe now. I’m sorry you were disappointed with the end result, I know what it’s like to spend hours on something only to be disappointed in the end.
I love your new format, Alie. The pictures really help to inspire me and I have learned to trust the quality of your recipes so I’m printing them and making my own Alie recipe book! I don’t need many cookies this year as everyone in my family is trying to lose weight and the others we aren’t seeing! Your 3in1 recipe is perfect for me to have a little variety and only one recipe. Thanks again!
Thank you Marnie! I love hearing this, makes me smile. Hopefully someday I’ll have a cook book for you hold in your hands and to enjoy! Until then, keep printing those recipes ;). Enjoy the shortbread cookies! xo Alie
It is just like my mom used to make.
That makes me so happy to hear, thank you for sharing 🙂 Happy Holidays.